 |
I
created a document that is 1024x768 pixels. First create a new layer and
with a FOREGROUND color of black and a BACKGROUND of white, go to
FILTER>RENDER>CLOUDS. |
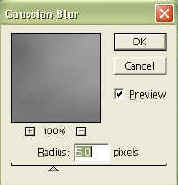 |
We
need to help these two colors blend, so go to FILTER BLUR>GAUSSIAN
BLUR with an amount of about 5. |
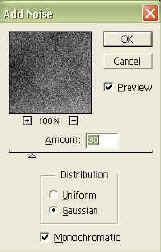 |
Next
go to FILTER>NOISE>ADD NOISE with an AMOUNT of 30, GAUSSIAN and
MONOCHROMATIC both checked. |
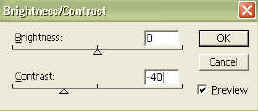 |
We
don't want such a huge contrast between black and white in the clouds,
because metal usually isn't black and white. Its a grayish
color. So go to IMAGE>ADJUST>BRIGHTNESS AND CONTRAST. with a
contrast setting between -40 and -50. |
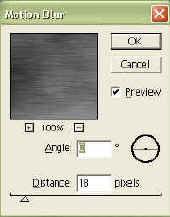 |
Go
to FILTER>BLUR>MOTION BLUR with an ANGLE of 0 and a DISTANCE of 18
to 20. Then go to FILTER>SHARPEN>UNSHARP MASK with an AMOUNT
of 500%, RADIUS 1.0 and THRESHOLD 0 |
 |
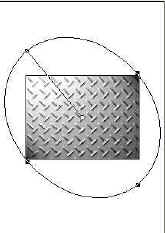
Ok,
now that we have our basic metallic texture created we need to created
the skid/grip things. =)
So, create a new layer then make a pattern like you see here.....
(this is just a thin elliptical marquee  filled with black then I rotated it 45 degrees (EDIT>FREE TRANSFORM) to a 45
degree angle by holding down shift while I rotated it. I then copied it
(hold CTR+ALT and drag) and went to EDIT>TRANSFORM>FLIP HORIZONTALLY
to make the bottom one. Then I just moved it into place by holding down
CTRL and dragging.)
filled with black then I rotated it 45 degrees (EDIT>FREE TRANSFORM) to a 45
degree angle by holding down shift while I rotated it. I then copied it
(hold CTR+ALT and drag) and went to EDIT>TRANSFORM>FLIP HORIZONTALLY
to make the bottom one. Then I just moved it into place by holding down
CTRL and dragging.) |
 |
Simple,
make all your layers UNDER your pattern layer invisible by clicking the
little eye  by the
layer in the layers palette. You need to do this so you don't mess
up the next step. by the
layer in the layers palette. You need to do this so you don't mess
up the next step. |
 |
So,
this is a cool trick. You need to make this pattern over the
entire plate. What do you do? Copy and paste? HA, do you
want to finish before your 94?
So take the rectangular marquee
tool  and WHILE
HOLDING SHIFT make a selection around your pattern. and WHILE
HOLDING SHIFT make a selection around your pattern. |
 |
Go
to EDIT>DEFINE PATTERN. Deselect and go ahead and bring back
your other layers. Now to use this pattern! Go to
EDIT>FILL change the CONTENTS box to PATTERN leave the OPACITY at
100% and the BLENDING MODE at MULTIPLY. |
| |
Go
to IMAGE>ADJUST>HUE AND SATURATION check COLORIZE and put the HUE
and SATURATION to 0 and LIGHTNESS to +40. We are looking for a
medium gray. |
| |
CTRL+CLICK
on this layer so you have a selection of the entire pattern. Now
to chrome our skid things. Go to FILTER>BLUR>GAUSSIAN BLUR
with a amount of 3. |
|
|
Next
go to FILTER>RENDER>LIGHTING EFFECTS with all of the default
settings EXCEPT change the TEXTURE CHANNEL to LAYER 2 TRANSPARENCY (or
whatever layer number yours is) and move your light direction like the
one shown.

*note: make sure this is on your pattern layer. |
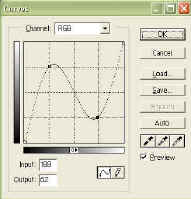 |
Go
to IMAGE>ADJUST>CURVES and do something like the picture to the
left. It doesn't need to be exact. |
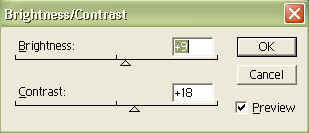 |
Deselect
your pattern. Go to IMAGE>ADJUST>BRIGHTNESS AND CONTRAST put the
brightness and contrast up a bit to bring out the whites and blacks in
the chrome. |
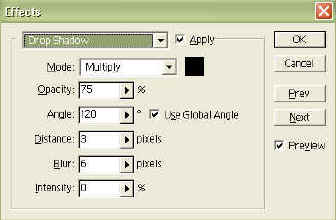 |
Last
step I promise! Go to LAYER>LAYER EFFECTS>DROP SHADOW with
default settings EXCEPT DISTANCE is 3 and BLUR is 6. Again go to
LAYER>LAYER EFFECTS> BEVEL AND EMBOSS and use all default settings
EXCEPT change blur to 1.
*note: if you want a more chrome look to you skid things go to the
pattern layer and then go to FILTER>SHARPEN>UNSHARP MASK
with an Amount of134%, radius of 1.0 and threshold of 0 .
(it looked good for me anyway) |
|
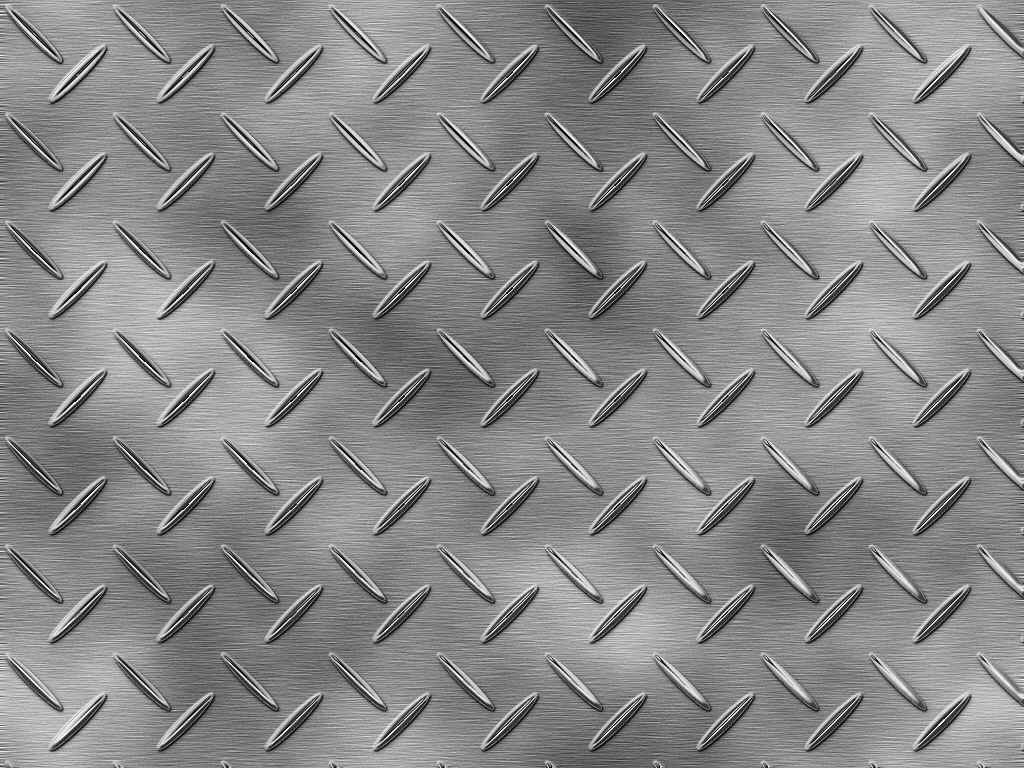
DONE!
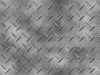
Click to see full-size result.
|