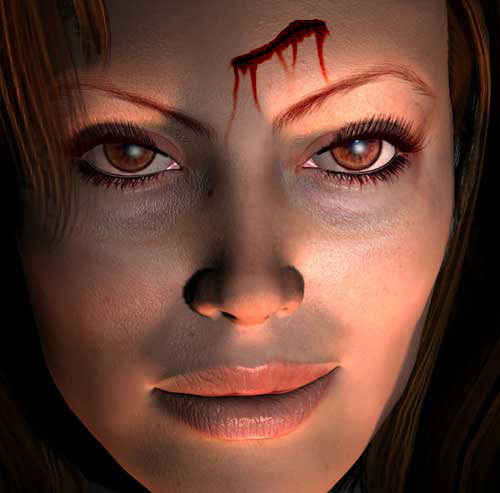
Take a the lasso tool
and draw a small thin area where you want the cut to be.
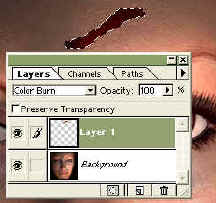
Next
fill the selection with a deep red and set the layer to COLOR BURN as
shown.
**Note: When you
put the layer to COLOR BURN that the red color will turn lighter or
darker depending on its background. So adjust your initial red
color accordingly. If it is going to be placed on a bright
background choose a darker red and vice versa.
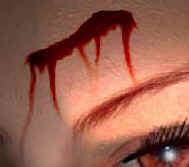
Now,
somewhat of an artistic ability has to present itself. Deselect
your blood. Take the SMUDGE TOOL
and smear your blood so it looks like it is running down your
picture. Use a brush that is roughly 1/4 the size of your actual
blood spot. Do this until your happy, try to run it along the
shape of your object, notice how I ran it around the nose so it looks as
if its going down into the eye cavity, or how it is starting to go up
over the eyebrow.
(smear it anyway you want, or for as long as you want, make it look like
it has been running for awhile, ANYTHING!)
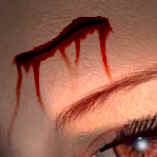
To
bleed, one must be cut. Take the BURN TOOL
and run a line in the middle following the contour of the blood.
Run it back and forth a few times until you get a thick dark line.
It wont be very noticeable. But small things that are not noticed
are what give realism.
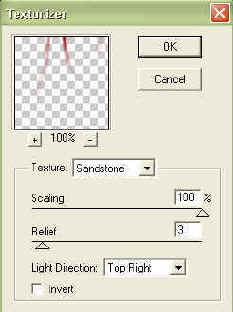
**The
next step is optional
Now what you can do depending on the object your putting blood on is add
texture. Skin has texture so I added some to my blood. here
is what I did. Make the LIGHT DIRECTION come from the same
direction as the light on your picture.
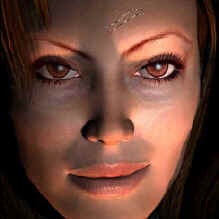
Here
it is all done. The screenshot to the left is small because I
figure you don't want to wait for a 78k file to load so you can click on
it if you would like to view the full picture.
Last Updated on
Sunday, February 26, 2006 11:58:29 PM
Pacific Standard Time
E-mail me Personally at hotice2000@hotmail.com
Organic Tragedy Est. 01.05.2003
Previously Shatter Designs Est. 4.14. 2000
Previously Hot Ice Graphics and Design Est. 1996